
You can print specific pages in LibreOffice Writer by choosing Pages in the print dialog and entering the page numbers or ranges you want. You can also highlight separate portions of text and print those using the Selection option.
The example here uses a 14-page employee handbook for Melcom Tech, but the same process applies to a thousand-page document. Start by opening the print settings and choosing your printer.
How to print specific pages in LibreOffice Writer
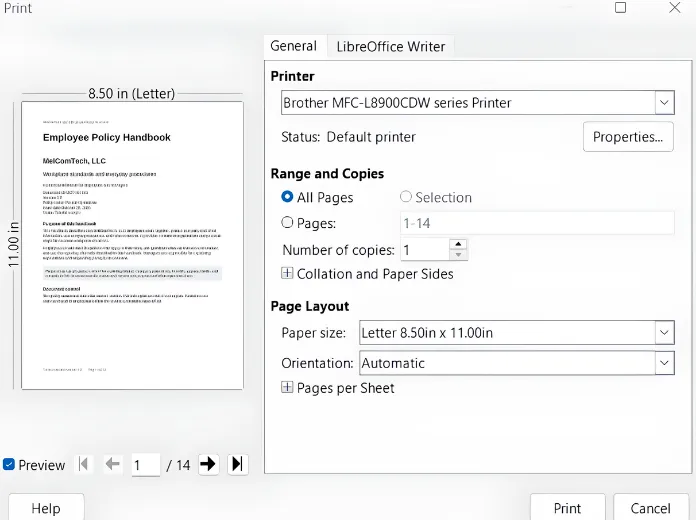
Open the print dialog and choose your printer
- Go to File > Print, click the printer icon, or press Ctrl+P to open the print dialog.
- Check the printer dropdown. If it defaults to Microsoft Print to PDF, select the physical printer you want to use.
- Look under Range and Copies. The default is All pages, so the handbook preview initially shows page one of 14.
Use ranges to print specific pages in LibreOffice Writer
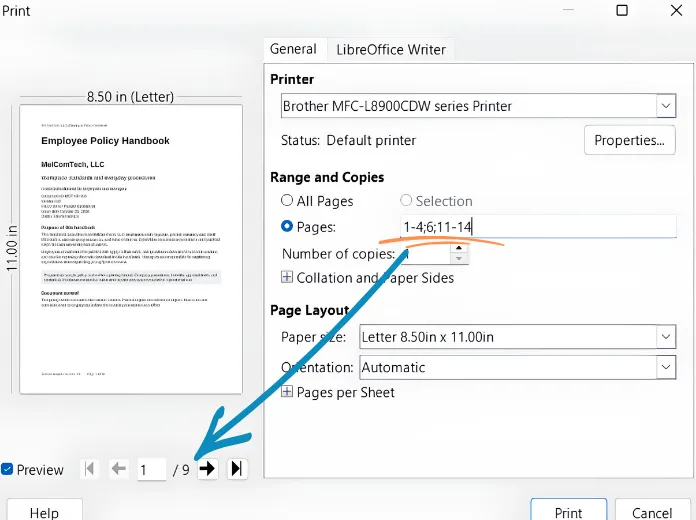
- Select Pages instead of All pages, then enter
1. The preview changes to one of one because you’re printing only page one. - Change the entry to
1-4to print pages one through four. The preview now contains four pages. - Add a semicolon and the number six:
1-4;6. You now have five pages, pages one through four plus page six. - Add another semicolon and the final range:
1-4;6;11-14. This includes pages 11 through 14 and brings the total to nine pages.
The preview updates as you change the entry. Check that it shows the pages you want, review the remaining print settings, and click Print to send them to your printer.
MORE FROM MELCOMTECH: Portrait and Landscape in Same Word Document
Print selected portions of text
You can also select what you want to print instead of printing whole document pages. In the handbook, the two sections are Working Hours and Attendance and Remote Work and Communication.
Highlight the sections and choose Selection
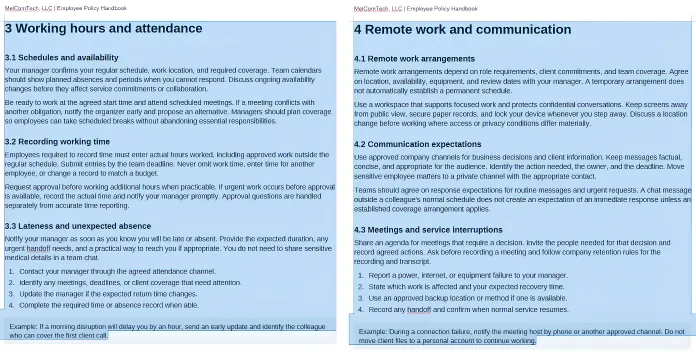
- Highlight Working Hours and Attendance as if you’re going to copy it.
- Scroll down to Remote Work and Communication. Hold Ctrl while highlighting that section to keep both portions selected. Be careful not to use the scroll wheel while holding Ctrl, because that can disrupt the selection and leave you needing to select the text again.
- Press Ctrl+P to return to the print dialog. With text highlighted, selection is available. Choose it to print the selected content.
- Check the preview. In this example, it shows two pages, one for each selected section.
- Confirm the printer again. If the dropdown still shows Microsoft Print to PDF, change it to your physical printer before clicking print in LIbreOffice Calc.
Each separate selection gets its own page
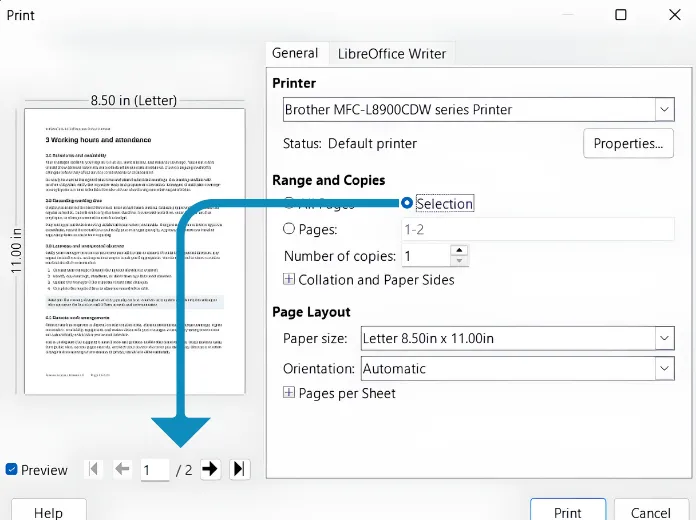
Whatever you select, it’s going to put it on its own page. The two handbook selections therefore appear on two separate pages.
If you have 15 different selections, you may have 15 pages to print. The preview shows how many pages your selections will produce.
Get Started with Microsoft 365 or LibreOffice.
Be sure to subscribe to my YouTube Channel for more Microsoft 365 and LibreOffice Tutorials.
This page may contain affiliate links. These are tools I personally use and love. I may receive a small commission should you make a purchase using one of these links. This helps keep the tutorials and website posts coming and up to date. Thank you for your support! For more information please see my full disclaimer.